Tuesday, August 7, 2012

Burgers

I've come a long way in the last couple years. I used to not be able to touch raw meat....blech.. disgusting. I used to cook all meat from frozen.

But now, I can do it without too much yuckiness (exception is cuts of meat that are fatty, or tendons... I still don't usually cook meat with bones (or skin)). Progress!

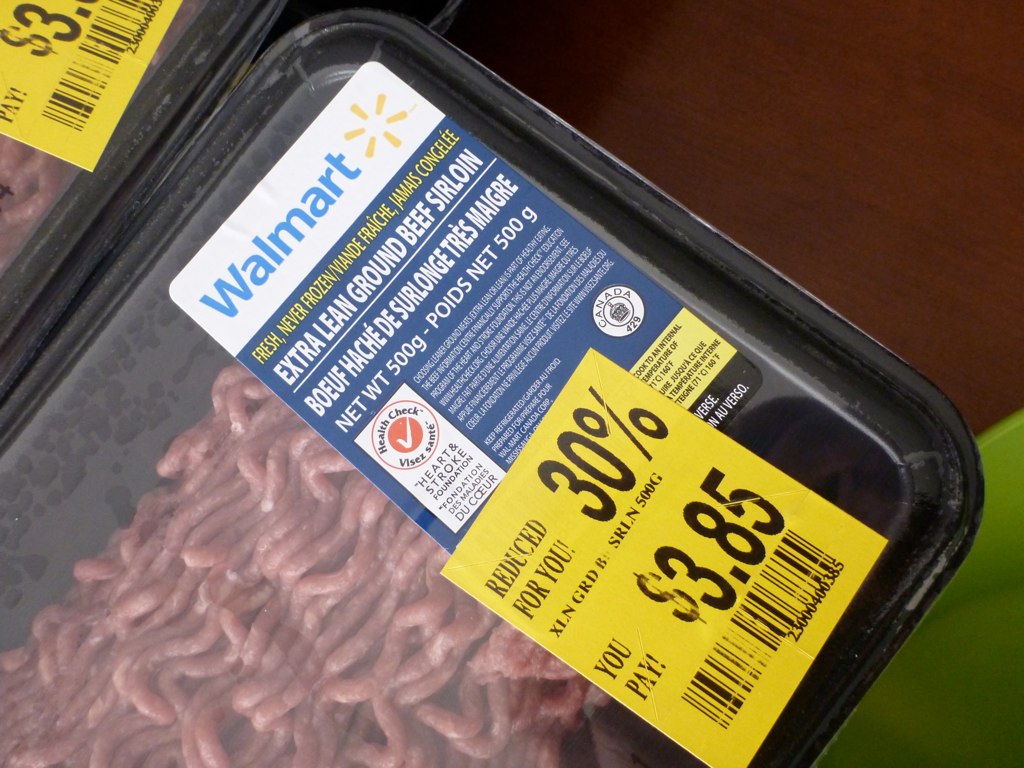
Another fact... I rarely buy meat at full price. I prefer to do my grocery shopping first thing in the morning, right after all the mark downs go out! I pretty much always find the meats I need marked down, and I stock up if I see them when I'm not doing my regular grocery shop. 30% off stickers are my best friend (and 50% off stickers in the bakery section).

The other day I scored six 500g packages of extra lean ground sirloin marked down. I didn't even clear them out.... i just stuck with the 6 and left. What does that scream to you? BURGERS! I love to make a big batch of burgers for the freezer and pull them out as we use them.

P1040659

This is the first summer I've ever made burgers.... ever! But they're delicious, easy, and a great freezer stocker for bbq nights. Gone are the days of pre-packaged frozen burgers that I always used to buy.

Here is my step by step.... I don't know any real recipes.. I read that you can make burgers with just beef, nothing else mixed in.. but we like a few extras.

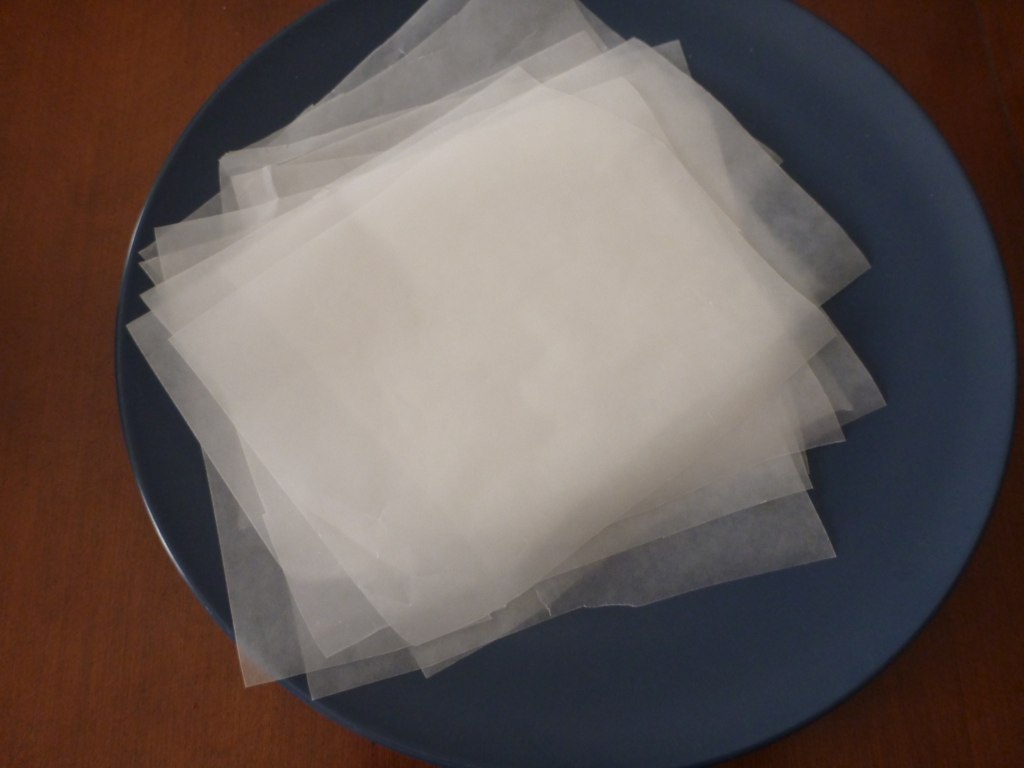
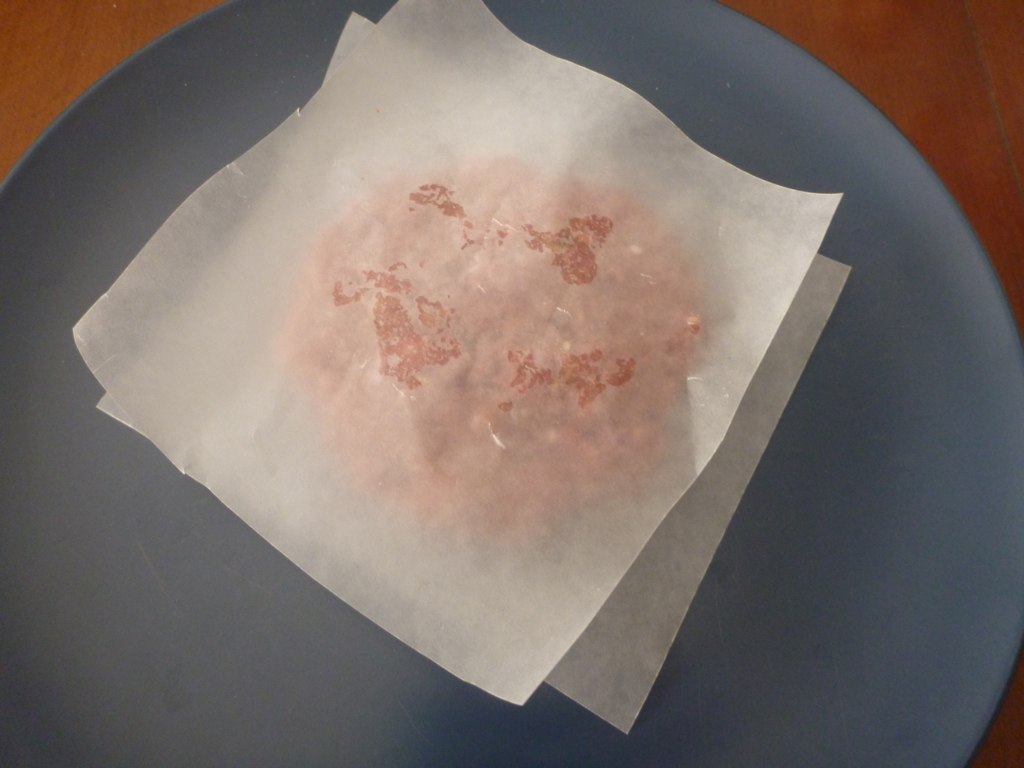
First step... cut pieces of wax paper (or parchment paper) larger than you plan to make your burgers (these will help you separate the burgers when you take them out of the freezer later)

P1040664

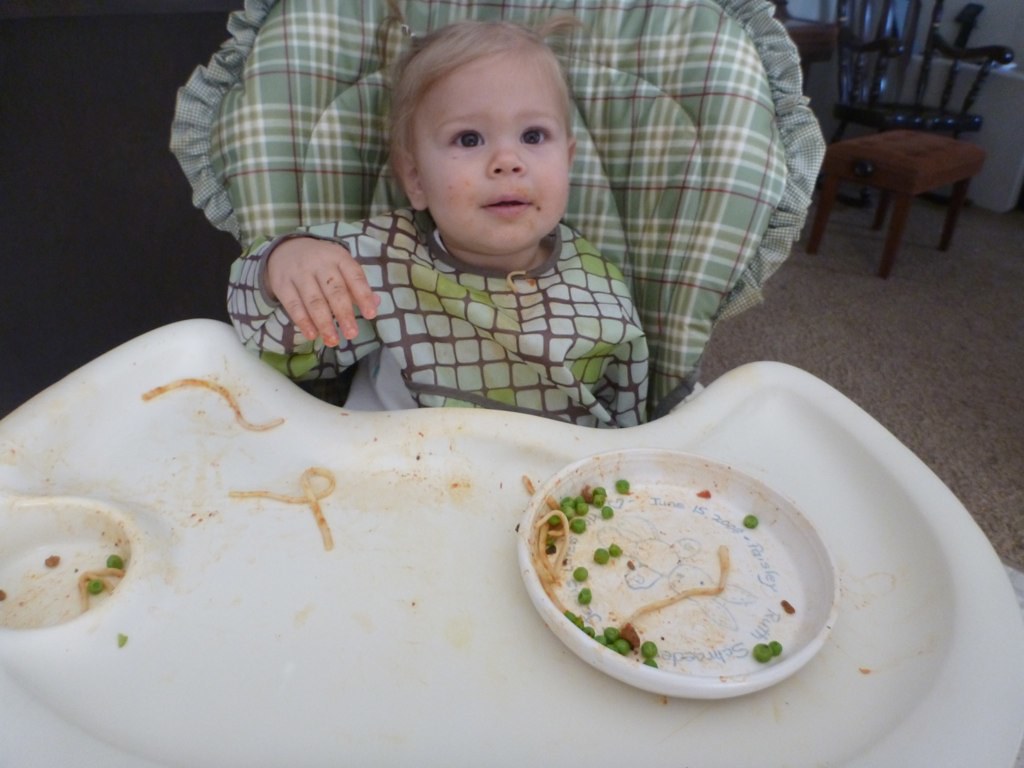
Next step... put toddler in high chair with some food that is fun to play with and will entertain them (spaghetti today). You just know you'll have to deal with them when your hands are covered in raw meat.... better to put them in a contained place with something to do.
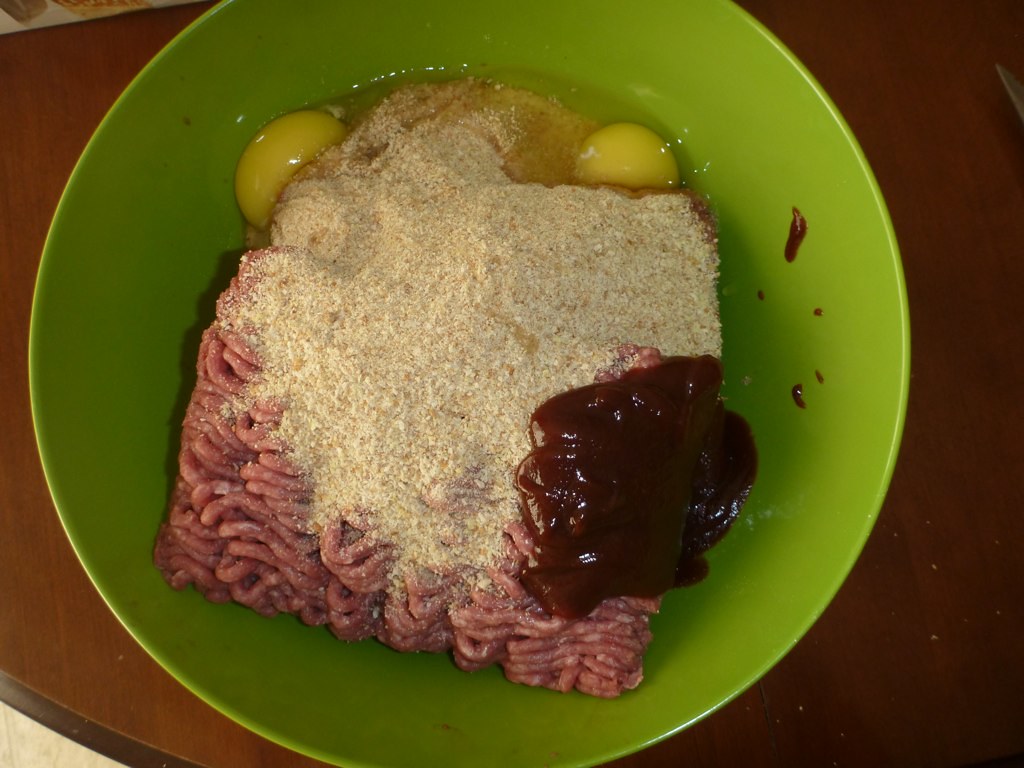
P1040666

Here's my recipe:

Beef Burgers

1500g lean ground beef
1 cup bread crumb
2 eggs
1/2 cup bbq sauce
seasonings of choice (I used Mrs Dash today.. but have used taco seasoning, italian seasoning, even curry).

Put it all in the bowl and mix together (spoon works.. but you'll get a more even mixing if you use your hands (you're going to have to get them in there to form burgers anyway.. so you might as well).

P1040661

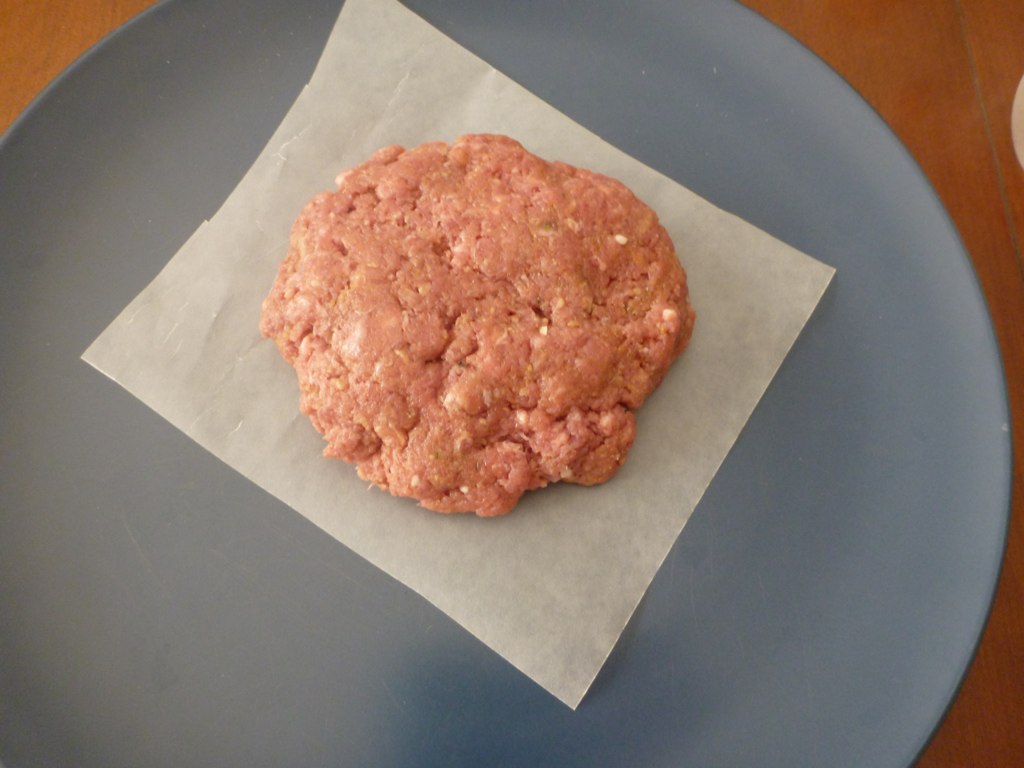
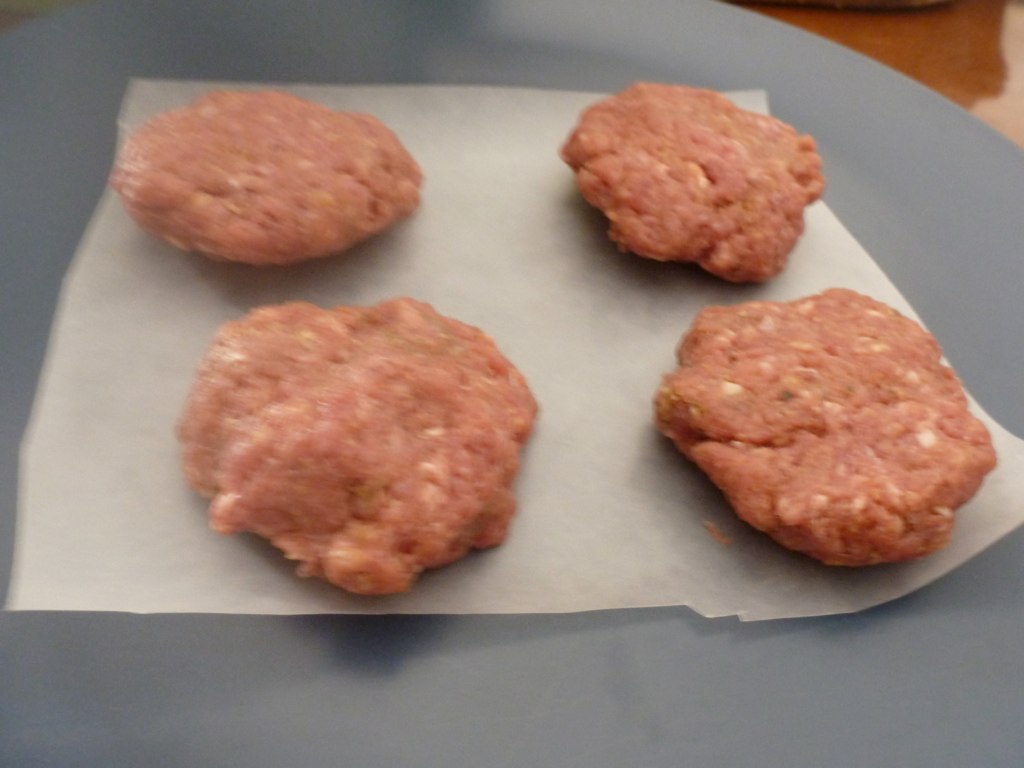
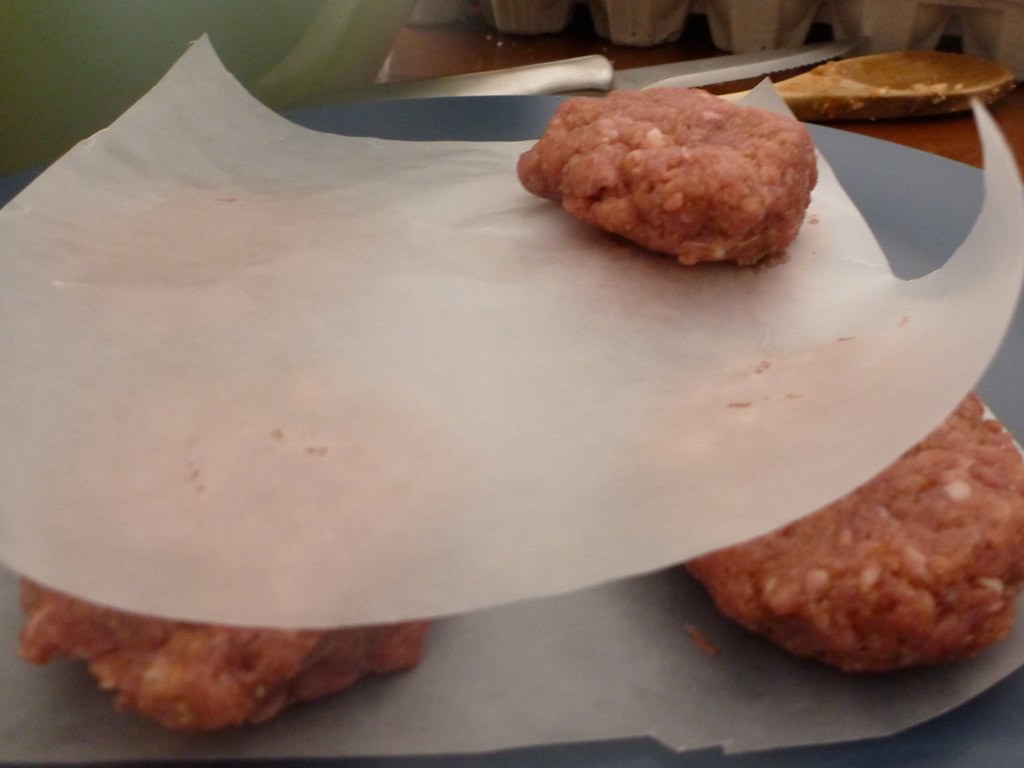
Once it's all mixed evenly, form patties to whatever size you like and place on a square of paper on a plate. Place another square on top and stack another burger... keep going (start a new stack when it starts getting high). Your kids might want to help... I let her put the papers inbetween layers for me... and she also took my photos for me!

*my husband just reminded me (yet again) that you're supposed to put a thumb indent in the middle of each burger for more even cooking. I forgot.. again. Maybe you can remember ;)*

P1040673

P1040674

I like to make slider size ones too (since the kids like these size burgers):
P1040678

P1040679

Wash up, transfer the burgers to freezer bags (or containers). When it's time.. just take out however many you need, and grill them up!

This recipe made 14 large burgers, and 12 sliders for me. I made 2 batches of this size, so I am stocked with burgers for a while now!

This recipe is very flexible.. throw in what ever you want! Onions, sauces, herbs, whatever you feel like adding! :)


This is just one of the recipes I do when I stock up on discounted ground beef. I actually use this same recipe for turkey burgers as well. When you buy discounted meat, you have to deal with it (prep to freeze, or cook with it) within a day or two, so always good to keep a few things on hand for mixing with them. I might have to post some of the other recipes I do when I get meats on sale. :)


Saturday, July 21, 2012

Zucchini Fries

Tonight we paired some zucchini fries with our turkey burgers.

DSC_8214

Zucchini Fries

2 medium zucchini
2 eggs
1 cup seasoned breadcrumbs (or you can crush up croutons)

Preaheat oven to 425F

Slice zucchini into sticks. Beat eggs in a medium sized bowl. Put breadcrumbs in a shallow dish. Take each piece of zucchini, dip in egg, roll in bread crumbs and place on an ungreased cookie sheet in a single layer.

Bake for 13-15 minutes until cooked.. rotating the cookie sheet halfway through the time to ensure even cooking.

Serve with a dill dip.

_________________________

These were a hit! EVERYONE devoured them (baby to adults). A great side dish for anything grilled. The dill dip really compliment the flavour of these.

Friday, July 20, 2012

Cherry Berry Ice Cream

It's been hot here, so I haven't been using the oven much, but have been making tasty COLD treats more often.

This is kinda a creation we made, since we had strawberries and cherries that needed to be used ASAP and I didn't want to bake or make jam.

You'll need a good blender for this recipe.. one that will completely blend up ice.

P1040389

Cherry Berry Ice Cream

3 cups cherries and strawberries - frozen
1 cup cherry yogurt (I used Silhouette 0% M.F.)
1 cup heavy cream
2-3 cups ice
1 cup chopped cherries (for mixing after)

Cut and pit the cherries and strawberries the evening before, and leave them in a bowl in the freezer overnight.

Place frozen berries/cherries in the blender (Vitamix). Add yogurt and heavy cream, and blend til smooth. Start adding ice (and tamping), until mixture gets very thick and is not moving much (2.5 cups of ice for me).

Scrape into a container for storing in the freezer, fold in the 1 cup chopped cherries. You can serve now (as it'll be soft serve consistency), or if you let it set for a couple hours in the freezer, it will harden up a bit more.

*if you have a strong sweet tooth, add about 1/2 cup of sugar in the first mixing in the blender. It's naturally sweet from the fruit, and then the sugar substitutes in the yogurt, but it's not a strong sweet like ice cream normally is. I liked it at this sweetness.

Enjoy!

P1040392

Tuesday, July 17, 2012

Corn on the Cob Trick

I've always microwaved my corn on the cob. Leave a single layer of husk on (after pulling as many silk out as possible).

But this tip I picked up from Pinterest is SOOO MUCH EASIER!!!


All you have to do, it pop the corn (husks, silk, everything) straight in the microwave (4 minutes/ear... so we do 3 ears = 12 minutes).

When it's done.. take your oven glove, grab one.. slice off the bottom/stem to where you can see the corn starting. With your gloved hand, grab the top of the corn, and squeeze... the corn cob slides out easily with no husks and no silks, ready to eat!! No fighting with the stringy silks, perfect corn every time.

We've tried it twice this year, and it works like a charm. I cannot wait for Taber corn to be ready... deliciousness!

Wednesday, July 11, 2012

Almond Milk Chocolate Banana Ice Cream

This may have been an experiment, but it was pretty tasty!!

We were a little eager to have dessert, so we didn't let it set up the full time in the freezer (plus it was hot out), so please excuse the photo.

DSC_7739

Almond Milk Chocolate Banana Ice Cream

1.5 cups of Almond Milk
2 ripe bananas
2-3 Tbsp of cocoa
2 Tbsp of sugar (this probably could be omitted, it was plenty sweet from the bananas and almond milk)

Heat up the almond milk with cocoa and sugar to get it all mixed together nicely (either microwave or stovetop). Don't make it hot, but just warm enough for the ingredients to blend nicely. Once it's mixed evenly, pour into a blender with the bananas, and blend til smooth.

Pour into your ice cream maker and run it for about 20 minutes. Pour in freezer safe bowl to set up for about an hour (or if you're like us, you'll pull it out after about 20 minutes, cause you just can't wait).

*in thinking now... if you cooled the whole thing after blending, in the fridge... it might set up enough to be ready to eat right from the ice cream maker.

______________________

This is super tasty. I will probably omit the sugar next time, but best way to test is to take a little spoonful taste test before pouring it in the ice cream maker.

You can tell from the picture it is quite soft, but if you leave it the full hour in the freezer, it should set up nicely.

I might also experiment with different flavours.. I love the nutty taste of the almond milk, plus it gives more dairy-free options.

I see a host of experiments coming from this one.... using both the ice cream maker (mine is an attachment for my KitchenAid Mixer), and using the Vitamix.

If you experiment with this recipe, let me know!! :) We started with chocolate.. since we're chocolate fiends... but I think I may give strawberry a go very soon!

Monday, July 9, 2012

Auntie Sharon's Oatmeal Chocolate Chip Cookies

These are a staple in our house. The go to cookie recipe! We call it Auntie Sharon's, because it was my aunt who gave us this recipe, once upon a time, and it's always been called that in our house. I'm not even sure she realizes that this recipe is such a favourite.

P1030719 (sorry to use the same photo twice, but I thought I had posted this recipe before)

Auntie Sharon's Oatmeal Chocolate Chip Cookies

1/2 cup shortening (I substitute margarine usually)
1/2 cup brown sugar
1/2 cup white sugar
1 beaten egg
2 tablespoons water
1/2 teaspoon vanilla
3/4 cup flour
1/2 teaspoon baking soda
1/2 teaspoon salt
1 1/2 cups oatmeal
1 1/4 cups chocolate chips

Combine shortening, sugars until smooth. Add egg and water, mix well.
Add all dry ingredients, except oatmeal and chocolate chips. Mix well.

Add oatmeal, and mix.

Add chocolate chips and mix until evenly distributed.

Drop onto greased cookie sheet by the tablespoonful.

Bake at 375 degrees for 10-15 minutes.

__________

Enjoy with a cup of milk or hot cocoa, or alone. Watch out though.. it's hard to eat just one or two.


Hot Cocoa

P1030719

It was a snowy day, in the middle of May, when I made this hot cocoa. I had just received my new Vitamix, and wanted to try a new recipe. Here is the recipe I used:

Hot Cocoa
3 ounces baking cocoa (approx. 3/4 cup)
1.5 cups water
1/3 cup sugar
4.5 cups milk

I put the ingredient in order in my Vitamix (you could just heat these ingredients in a pot on the stovetop, I just wanted to try the heating feature on my Vitamix). I turned it on, and let it go on high until it was steaming and hot.

______

This cocoa was delicious!! Not too sweet (but sweet enough for the 3 year old), rich chocolate flavour, and nice and frothy! It could easily be adapted to different flavourings too!

Paired in the photo with some of Auntie Sharon's Oatmeal Chocolate Chip Cookies

Tuesday, July 3, 2012

July Meal Plan

The chaos of June has passed and it's on to July.

This month is a little more low key, we should be able to start harvesting some food from the garden, and I am excited to try many new recipes.

1 - Away
2 - Pizza
3 - Hot Dogs, Sweet Potato Fries*
4 - Honey Garlic Sausage, Perogies, Salad
5 - Tortilla and Black Bean Pie*, Salad
6 - Meatloaf Muffins*, Potatoes, Veggies
7 - Beef Burgers, Salad
8 - Waffles, Fruit
9 - Chicken Teriyaki*, Rice, Veggies
10 - Mini Ham and Cheese Frittatas*, Veggies
11 - Coconut Curry*
12 - Breakfast Quesidillas
13 - Easy Piergi Casserole*, Salad
14 - Turkey Burgers, Zucchini Fries*
15 - Muffins, Fruit
16 - Broccoli Quinoa Casserole*, Salad
17 - Shepherd's Pie, Salad
18 - Chicken Enchilada Soup*, Buns
19 - Chicken Black Bean Quesidillas
20 - Honey Sesame Chicken*, Rice, Veggies
21 - Steak, Stuffed Potatos*, Veggies
22 - Frittata, fruit Salad
23 - Salsa Chicken*, Rice, Salad
24 - Tuna Macaroni, Veggies
25 - Dr Pepper Pulled Pork*, Potatoes, Salad
26 - Pork Wraps
27 - Homemade Pizza
28 - Cheesy Salsa Tuna Burgers*, Carrot Fries*
29 - Idaho Sunrise*
30 - Grilled Cheese, Soup
31 - Take out

* - new recipe... will try to blog them

For July:
Wed = Crockpot
Thurs = Quick Meals
Sat = BBQ nights

Friday, June 1, 2012

June...

Can you believe it's June already? That marks almost a full year since I've been good about keeping up this blog. Terrible!

I just did up my June meal plan. Goals this month... use meat from the freezer (I always buy when I find it marked down, and there still extra grocery money). I didn't venture into many new recipes this month. It's a busy month for us, and so I'm going to classics, or ones I've done once or twice at least. I have a million burgers in the freezer it would seem... so guess what Saturday nights are?

June:

1 - Breakfast (sausage, eggs, diced potatoes)
2 - Chicken Burgers, Corn & Potato Salad
3 - Muffins and fruit
4 - Chili
5 - Turkey stir fry
6 - Baked Butter Chicken, Rice, Salad
7 - Ham, Potatoes, Veggies, Salad
8 - Pizza, veggies
9 - Beef Burgers, Salad
10 - Breakfast (turkey bacon, eggs, diced potatoes, toast)
11 - Veggie Soup
12 - Tuna Melts, Raw Veggies
13 - Roast Beef, Potatoes, Veggies, Yorkshire Puddings, Salad
14 - Green Spaghetti, Salad
15 - Potluck at school (Beef Stroganoff)
16 - Salmon Burgers, Salad
17 - Muffins, Fruit
18 - Bean Burritos, Salad
19 - Pork Chops, Potatoes, Veggies, Salad
20 - Tuna Macaroni, Veggies
21 - Chicken Curry, Rice, Veggies
22 - Pizza
23 - Husband is in charge.... whatever he feels like cooking
24 - Waffles, Fruit
25 - Beans and Rice
26 - Stew, Buns
27 - Penne, Veggies, Salad
28 - Frittata
29 - Travelling
30 - Travelling

Saturday, May 5, 2012

Prepping to meal plan

Getting ready to work on this week's meal plan.

P1030626

Some of my favourite books on the shelf got pulled for this week:
P1030627

We have company for the whole week! So I'm excited to actually cook... probably all new recipes too.. since I'll have extra hands with kids.

My meal planning is usually monthly, and my process is:

1. Decide if I'm working out of cookbooks or online (often I do a combo). I find I have all these books on the shelf though, and rarely use them... so I make an effort to use them almost every month.

2. Set everything on the table... and wait.... and wait... until all kids are sleeping, or otherwise busy (preschool, out with daddy, etc).

3. Start flipping through books until something catches my eye (or browsing recipes on pinterest, or my favourite food blogs).

4. I write a general list at first... just write down the recipes, where they were found, etc.

5. Start assigning recipes to days on the calendar (I generally use a full size calendar when doing it by month). As I assign, I know Tues/Thurs I have more time in the morning, so crockpot recipes I do those days, Saturday I know I never think about dinner til it's dinnertime... so something quick those nights, and so forth... (Also great to use a calendar, since you can see any other events you have those days, to accomodate what type of meal you'll want to do).

6. Also good to account for leftovers. I generally don't have leftover nights in my meal plan, since my husband takes them for lunches the next day. The exception is if we have a larger meal on a Thursday or Friday, I'll have left overs Saturday, since they won't be good for lunches the next week.

7. Hang it up! Blog it! :)

I never stress about my meal plan, I completely rearrange it as the month goes on.. sometimes things come up, and you need to postpone a meal for when you have more time... sometimes you get taken out for dinner, etc... rearrange, drop meals that the ingredients will keep with freezing. Meal planning is so stress free! I mean, we love looking at recipes, salivating over them anyway... this just gives you a 30-60 minute scheduled time to do so! :)

Off to tuck the little one in for nap, and send the bigger for quiet time. Will post tomorrow! :)

Happy Planning!

Sunday, April 29, 2012

Meal Plan

Well it's meal plan time again.. but this month I'll be doing 1 week at a time. We have a busy month ahead, so not as much cooking planned.

This week it's just me and the kiddos... so it'll be super easy foods that they both love. Probably won't be many recipes attached to these, as they'll be pretty easy ones, and then I'll cook a "real" meal for Sunday for when the hubby returns.

Monday - quick bean burritos, salad
Tuesday - potato soup
Wednesday - hot dogs, salad
Thursday - stir fry, rice
Friday - green spaghetti
Saturday - homemade pizza
Sunday - ham, scalloped potatoes, veggies

It's an easy week for me :P Not very rewarding cooking for a toddler and a baby, so will just keep to simple ones they love.

The next week will be more fun, as we'll have out of town company! :)

Monday, April 16, 2012

Chicken Stuffing Bake

This recipe was a quick throw together meal we did in March (I'm really behind in blogging right now, lots of photos to work my way through and match recipes and reviews with).

Chicken Stuffing Bake

P1020548

1 can condensed cream of mushroom soup, undiluted
1 cup skim milk
1 box stuffing (Stove Top)
2 cups cubed cooked chicken
2 cups fresh broccoli, cooked
2 celery ribs, finely chopped
1-1/2 cups shredded reduced-fat Swiss cheese, divided (used Mozzarella and parmesan)

In a large bowl, mix soup and milk until blended. Add stuffing mix with contents of seasoning packet, chicken, broccoli, celery, and 1 cup cheese. Move to a greased 9x13 baking dish.

Bake, uncovered, at 375 F for 20 minutes or until heated through. Sprinkle with the remaining cheese; bake 5 minutes longer or until cheese is melted.

______________________________

We all enjoyed this meal. I expected as much though, as we all love broccoli, chicken and pretty much every ingredient. I did swap the swiss out, since I don't like swiss cheese, and neither does the toddler.


I have slacked lately in the kitchen. I didn't complete all my recipes in March.. and it' already halfway through April and I haven't made a meal plan (I aim to do that today). We were away for a little bit of April, and March and early April there was lots of sickness passing through our house, so I just didn't feel like cooking. We had lots of our old favourites for meals, and many quick meal nights (pasta, soup, chicken with sides). I'm ready to get back in the kitchen... so it's time to get back in gear. Hopefully we are a healthy bunch for the next few months!

Saturday, March 17, 2012

Kitchen Tip

Here's another tip that I've been using for a while:


It really works. I just toss a marshmallow in my brown sugar and it's always soft! Best trick ever!

I had a brown sugar baby and either my sugar would get hard anyway, or it would get moldy. Ick. But the marshmallow has been the best thing ever for my brown sugar. I used to have to buy a new bag of sugar almost every time I wanted to make something... and now I use the full bag.

Best part... my daughter gets a tasty treat of a marshmallow when I put new sugar (and marshmallow) in the container (pretty soon I'll have to put 2 marshmallows in, just to make sure the girls aren't fighting over the marshmallow). :).

Wednesday, March 14, 2012

Matzo Ball Soup

This is a soup my mom always made after a turkey. She learned it from a friend of hers, once upon a time. We loved it in our house... and now my family loves it as well.

P1020433

Matzo Ball Soup

3L Chicken or Turkey Broth (approximate)
4 Carrots, cut in thin sticks
2 Parsnips, cut in thin sticks
2 Celery Stalks, sliced cross-grain
2-3 cups chicken or turkey

2 Tbsp Vegetable Oil
2 large eggs, slightly beaten
2/3 cup Matzo Meal
1 tsp salt (or less.. if you want)
2 Tbsp soup stock or water


In a bowl blend the oil, eggs, Matzo meal and salt together. And soup stock/water and mix until uniform. Cover and place in the fridge for 15 minutes.

Throw the broth (homemade or store-bought) in the big pot with the carrots, parsnips, celery and chicken/turkey. Allow veggies to cook.

Bring soup to a boil, reduce to simmer, and form 1 inch balls of the matzo ball mixture and drop into the pot. Cover and let cook for 30-40 minutes.

Serve.. generally it works out to 1 matzo ball per bowl. In this house we tend to do 2, so I double the matzo ball part of the recipe.

______

We really enjoy this soup.. it's super easy to make with leftovers after a turkey dinner. This last time baby even got to enjoy the softened veggies and matzo balls and really enjoyed it (she was eating around the carrots to get the chunks of matzo ball though).

Monday, March 5, 2012

Peanut Butter Banana Muffins

Was looking for a peanut butter muffin recipe and came across this one from Lu.

Peanut Butter Banana Muffins

P1020371

1 3/4 cups flour
1 tsp baking powder
1/2 tsp baking soda
1/4 tsp salt
3/4 cup sugar
1/4 cup unsalted butter, soften
1/4 cup chunky peanut butter, soften
2 eggs
3 large bananas, mashed
1 banana, sliced

In a small bowl, whisk together flour, baking powder, baking soda and salt.

In another bowl, cream together sugar and butter until fluffy, about 5 minutes. Beat in peanut butter. Add in the eggs, one at a time. Then mix in mashed banana.

With the mixer on low speed, beat in the flour mixture until just combined.

Fill GREASED muffin cups 2/3 full. Top with a sliced banana. Bake for 20 to 25 minutes, until a toothpick comes out clean.


-------
These were good, but not great. The taste of peanut butter wasn't much. Next time I'll double the peanut butter. I also won't be adding the slice of banana on top. It makes for a pretty muffin, but within an hour after baking, it turns brown and icky (and creates extra moisture in the container you package them in). Overall though, it was pretty tasty, just not fantastic.. I think the additional pb will make it extra tasty.... right now it tastes more just like a banana muffin, with the tiniest hint of peanut butter.

Sunday, March 4, 2012

Pumpkin Doughnut Muffins

I had some pumpkin to use up, and didn't have enough supplies for my pumpkin apple muffins, so I searched for a new recipe.

I found this one on Tasty Kitchen... called Pumpkin Doughnut Muffins

Pumpkin Doughnut Muffins

P1020364

1 1/2 Cups Flour
1 1/2 tsp Baking Powder
1 tsp Pumpkin Pie Spice
1/2 tsp Salt
1/2 cup Sugar
1/2 cup Butter
1 Egg
1 cup canned Pumpkin
1 tsp Vanilla
1/2 cup Milk

Topping:
1/2 cup Sugar
1 tsp Pumpkin Pie Spice
1 tsp Cinnamon
1/2 cup Butter, Melted

In a bowl mix dry ingredients together (flour, baking powder, spice, salt).

In another bowl, cream together sugar, egg and butter. Add in pumpkin and vanilla.

Add dry ingredients and milk to the other ingredients and beat well.

Spoon into GREASED muffin cups (2/3 full), and bake at 350 F for 20-25 minutes (until toothpick comes out clean).

In a small bowl mix up sugar and spices. Melt butter in a separate bowl. When muffins have cooled enough to handle, dip in melted butter, then roll in sugar mixture.

The original recipe coated the entire muffin in sugar and butter, but I opted to just do the tops.. and it's plenty sweet enough.

________

These muffins were delicious. We all enjoyed them, but definitely a more dessert type muffin rather than a breakfast muffin. They are moist and light, and just the perfect amount of spices in there. Enjoy!

March Meal Plan

Not sure where March is going, but I'm just now getting a chance to blog our meal plan for the month.

This month I am mostly doing new recipes, with just a few old ones thrown in.

In no particular order (since I grab from the list based on time, what we feel like that day):

1 - Best Slow Cooker Beef Stroganoff*
2 - Grilled Chicken and Pineapple Quesadillas*
3 - Turkey Stirfry and Rice
4 - Stew
5 - Pizza
6 - Slow Cooker Quinoa Casserole*


7 - Mozza Tomato Gnocci Bake*
8 - Matzo Ball Soup*
9 - Slow Cooker Teriyaki Chicken*, Rice
10 - Bubble Up Enchiladas*
11 - Slow Cooker Tikka Masala*


12 - Chicken Taco Chili
13 - Beef and Broccoli*


14 - Cranberry Chicken
15 - Chicken and Cheese Lasagna Roll Ups*
16 - Tacos
17 - Rosemary Garlic Chickpea Soup*


18 - Creamy Chicken and Broccoli Casserole*
19 - Sloppy Joe Pizza*
20 - Chicken Stuffing Bake*
21 - Spaghetti and Meatballs
22 - Veggie Cheese Soup*
23 - Broccoli and Black Bean Rice*
24 - Slow Cooker Pot Roast, Roasted Veggies, Yorkshire Pudding


25 - Balsamic Pork Roast*
26 - Waffles and Fruit
27 - Quick Burritos
28 - 15 Min Chicken and Rice*
29 - Hot Dogs, Potato Salad
30 - Slow Cooker Potato Soup*
31 - Slow Cooker Chicken Caesar Sandwiches*


*will try to share these recipes with reviews.

Saturday, February 25, 2012

Make-Ahead Unstuffed Shells

Recipe was found in Kraft's What's Cooking Magazine (Festive 2011).

Not as pretty on my plate as in the magazine:
P1020278

Make-Ahead Unstuffed Shells

4 cups medium pasta shells, uncooked
1 lb (450g) extra lean ground beef
1 jar pasta sauce
1/4 cup cup Philadelphia Light Cream Cheese Spread
1/2 cup milk
1/4 cup Parmesan Shredded Cheese
1/3 cup chopped fresh basil
1 1/2 cups Park Skim Mozzarella Shredded Cheese

Cook pasta as directed on package (no salt).

Brown beef in a skillet. Stir in the pasta sauce and simmer for 2 minutes, stirring.

Drain pasta. Wish cream cheese, milk and parmesan in large bowl, add pasta and basil and stir until evenly coated.

Spray a 9 x 13 pan, spread half the meat sauce o the bottom, cover with pasta mixture, then top with remaining meat sauce. Sprinkle with mozzarella. Cover with foil.

Refrigerate for up to 24 hours.

Heat oven to 375 degrees... bake casserole covered for 40-45 minutes (uncovered for the last 10-15 minutes)

You can also bake immediately after making for 30 minutes (uncovering for 20 minutes)

______________

This was pretty good... nice creamy cheese, good flavour. It was super easy to make, and everyone ate their plate fulls. Probably not 5 stars, but definitely 4. Will be on the meal plan again, most likely. I don't even have any suggestions on this one for improvement. It was good... just not spectacular!

Sunday, February 19, 2012

Coffee Creamer

Since my 2nd pregnancy, I still haven't gotten back to black coffee. I love coffee.. but it's like a mini comfort when things are hectic to have that yummy flavoured creamer in my coffee. I discovered this idea a while ago to make my own.


I use the low-fat Eagle brand and skim milk in mine (double the milk of the can of Eagle brand), but boy, does it make coffee even more delicious, and I'm not buying those chemically laden flavoured coffee creamers from the store. I don't think it saves me much money, if at all, but I know what's in it! Maybe I should buy my Eaglebrand in bulk...

Great idea Mrs Happy Homemaker! By the way... it's a fabulous blog you have to check out!

Saturday, February 18, 2012

Tip on Hardboiled Eggs

I found this pin on pinterest... and HAD to try it:


I mean, I love hardboiled eggs, but they're such a pain to peel.. and chunks of egg come with the peels, etc... hardly pretty at all.

It's a BRILLIANT way to de-shell eggs, and they're perfect EVERY TIME!! It was too good to be true.... so I tried it. Here's what you do:

-Put eggs in pot, fill the pot with cold water (make sure eggs are covered)
-Turn stove to high, and bring to a rolling boil (don't keep boiling)
-Remove from heat, cover with lid, and let sit for 15 minutes
-Pour out water, and fill with COLD water... add ice, keep adding ice until it doesn't melt anymore.
-After 10-15 minutes, pour off all water except about an inch
-Put the lid back on, and shake it gently back and forth for about a minute.
-When you open the pot... the eggs have peeled themselves and the eggs look pretty much perfect. Any shells that remain should just fall off when you pick up the egg.

It could not be any easier... so easy to do while you prepare something else in the kitchen.. do dishes, etc... super simple and perfect... I don't know how this isn't common practice. Thank you PINTEREST! I now can enjoy hardboiled eggs more often, and also make potato salad more often. YAY!

Honey Sesame Chicken

I found this recipe on Six Sisters' Stuff blog! I love that blog, always lots of great things on it!

P1020172

Slow Cooker Honey Sesame Chicken

4 boneless, skinless chicken breasts
Salt and pepper (I omitted)
1 cup honey
1/2 cup soy sauce (low sodium)
1/2 cup diced onion
1/4 cup ketchup
2 Tbsp vegetable oil
2 cloves garlic, minced
1/4 tsp red pepper flakes (optional -I omitted)
4 tsp cornstarch dissolved in 6 Tbsp water
Sesame seeds

Season both sides of chicken with lightly with salt and pepper (I didn't want the extra sodium, so I skipped this), put into crock pot. In a bowl, mix the honey, soy sauce, onion, ketchup, oil, garlic and pepper flakes (I actually added some minced ginger in here as well). Pour this mixture over the chicken.

Cook on low for 3-4 hours or on high 1 1/2 – 2 1/2 hours (until chicken is cooked). Take the chicken chicken from the slow cooker, but leave the sauce. Dissolve 4 tsp of cornstarch into 6 Tbsp of water and add to the sauce in the slow cooker. Stir. Cover slow cooker and cook sauce on high for 10 minutes or until slightly thickened. While the sauce is thickening, cut the chicken into small pieces, then put them back in the slow cooker and stir into the sauce before serving.

Sprinkle sesame seeds on top.

_______________

DELICIOUS. We all really enjoyed this recipe, we even served it to company. I added some minced ginger to it, and I think it made it very good (although I think it would be very good without it).

I think this is one of our new favourites, and it's very quick and easy to make. I didn't even thaw my chicken ahead of time, just put it in about 30 minutes early.

Oh and the toddler asked for thirds!

Monday, February 13, 2012

Happy Valentine's Day!

I was on snack duty for preschool for Valentine's Day. I went through a variety of ideas, but of course it HAS to be cupcakes!

I was trying to come up with something fun, but decided to stick with the classic chocolate cupcake, and then for icing, I decided to come up with a strawberry jam buttercream. There's one kid in the class that has a red dye allergy, so I had to not include anything pink or red.... but a natural pinkness would be perfect.

I also decided to try a trick I saw on pinterest:

Source: flickr.com via Tamara on Pinterest


Heart shaped cupcakes!

Here's the result:

P1020065

P1020063

I made a strawberry jam buttercream once before, but it wasn't this perfect. I used that one to top a peanut butter cupcake (and it was a delicious combo), but I think I perfected the recipe this time!

Strawberry Jam Buttercream Icing

1/4 cup butter
1/2 bag of icing sugar
3/4 cups strawberry jam (used my homemade jam from this last summer)
3(ish) Tbsp milk

Using a hand mixer (or you could use a stand mixer), thoroughly mix the butter and jam. Add icing sugar and milk until you have reached the desired consistency. I'm not exactly sure how much milk I used, but I did use half the bag of icing sugar, and just splashed a bit of milk here and there.

Super simple... just buttercream with jam in it.... maybe it was the difference between store bought and homemade preserves.... or maybe I just had the proportions better this time, but it was DELICIOUS... like lick the bowl out delicious.

Wednesday, February 8, 2012

Cream of Broccoli - Cheese Soup

This recipe is one from Weight Watchers - Simply the Best Cookbook.

P1010953

Cream of Broccoli-Cheese Soup

1 onion, chopped
4 cups chopped broccoli
3 small potatoes, peeled and cubed
4 cups skim milk
3 packets low-sodium instant chicken broth and seasoning mix
1 carrot, shredded
3/4 cup shredded reduced fat sharp cheddar cheese
1/4 tsp dried sage
1/4 tsp freshly ground black pepper


Spray a large sauce pan with nonstick cooking spray; heat. Add the onion and cook, stirring constantly, until softened, about 5 minutes. Add the broccoli, potatoes and 2 cups of water; bring to a boil. Reduce the heat and simmer, covered until the vegetables are tender, about 20 minutes.

With a slotted spoon, transfer the vegetables to a blender. Puree, then return them to the liquid. Add the milk, broth mix and carrot. Bring to a boil. Reduce the heat and simmer, stirring as needed until the carrot is softened, about 5 minutes.

Remove the pan from the heat; cool about 1 minute. Add the cheese, sage and pepper; stir until the cheese is melted.

_____________________

Review: TASTY! we really enjoyed this soup. The only thing I might change next time is either cook and puree the carrots with the rest of the veggies... or throw some extra chunks of broccoli and potatoes in after pureeing, so there are more chunks. The only chunks being carrots was kinda weird... so I'd like either more or less. The soup itself was delicious and had great flavour, and my suggestions are just totally personal preference.

I didn't get a chance to make my own buns that day, so ended up scoring some clearance ones at the store to accompany our soup.

Slow Cooker Chicken Curry

We love curries, so delicious. I was excited to try this super easy crockpot recipe.

P1010951

Recipe from Kraft, in my What's For Dinner magazine (fall 2011).

Slow Cooker Chicken Curry

10 bone-in chicken thighs (skin removed)
1 jar thick and chunky salsa
1 chopped onion
2 Tbsp curry
1/2 cup cream cheese spread

Place chicken ini slow cooker. Combine next 3 ingredients, and pour over chicken. Cover with lid.

Cook on LOW 8 to 10 hours or on HIGH for 5 hours.

Transfer chicken to platter; cover to keep warm. Add cream cheese spread to slow cooker; whisk until cream cheese is melted and sauce is well blended. Spoon over chicken.

________

Review... rather flavourless.... I think it would have been better with more different indian spices. Doubt we will make it again... our favourite chicken curry is still this one: Chicken Curry

Wednesday, February 1, 2012

Hawaiian Turkey Stirfry

Here is a Weight Watchers recipe. It's from the book Weight Watchers' Simply the Best : 250 Prizewinning Family Recipes I used chicken instead of turkey, since that's what I had on hand.

Hawaiian Turkey (Chicken) Stirfry

P1010925

1 tsp canola oil
2 carrots, julienned
2 celery stalks, sliced
2 onions, chopped
2 Tbsp flour
1 cup low-sodium chicken broth
2 cups cubed cooked skinless turkey breasts (or chicken)
2 cups sliced mushrooms
1 20-ounce can unsweetened pineapple chunks (with juice)
1 tsp dried thyme leaves
1/4 tsp dried sage

In a large skillet, heat oil. Add carrots, celery and onions. Cook, stirring as needed until softened (6-8 minutes).

In a small bowl, combine the flour with 2 Tbsp cold water, mix into a smooth paste. Gradually add chicken broth, and mix until smooth. Pour into the skillet, cook stirring constantly until the mixture boils and thickens (2-3 minutes). Stir in the turkey, mushrooms, pineapple and it's juice, thyme and sage. Bring to a boil. Reduce the heat and simmer, covered, until heated through (3-4 minutes).

Serve on top of rice.

_________

I had high expectations of this recipe... I love pineapple, carrots, celery, and pretty much everything in it. It was good, but bland. I did have to add a little extra broth, just to give it more moisture. I think I adding some teriyaki sauce would make it a super yummy recipe, and compliment the existing ingredients. I did like that it was healthy (but what stir fry isn't, that isn't overloaded in sauce). I think I will try it again, but with some tweaks.

Monday, January 30, 2012

February Meal Plan

Here we go.. jumping back into a meal plan and lots of new recipes.

* a new recipe to me - will share them

1 - Hawaiian Turkey Stir-fry*, Rice
2 - Slow Cooker Chicken Curry*, Rice, salad
3 - Tuna Melts, raw veggies
4 - Cream of Broccoli and Cheese Soup*, buns
5 - Roast beef, yorkshire puddings, roasted veggies
6 - Green Spaghetti
7 - 15 Minute Chicken and Rice*, salad
8 - Beef Taco Bake*, salad
9 - Eggs, turkey bacon, diced potatoes
10 -Quick Chicken Curry*, Salad
11 - Pizza, raw veggies
12 - Waffles, fruit
13 - Southwest Easy Oven Chicken*, salad
14 - Tacos
15 - Creamy Chicken and Spinach*, veggies
16 - Baked Mac and Cheese*, veggies
17 - Slow Cooker Sesame Chicken*, rice, salad
18 - Savoury Chicken Bundles*, salad
19 - Black Bean Enchiladas*, salad
20 - Soup, grilled cheese sandwiches
21 - Crockpot Cheesy Chicken and Potatoes*, veggies
22 - Take Out
23 - Make Ahead Unstuffed Shells*, salad
24 - Hot dogs, potato salad
25 - Balsamic Pork*, mashed potatoes, roasted veggies
26 - Tuna macaroni
27 - Creamy Chicken and Broccoli Casserole*, veggies/salad
28 - Baked Butter Chicken, rice, veggies
29 - Spaghetti and meatballs, veggies/salad

Saturday, January 28, 2012

Travelling

We travelled over Christmas, and were away for almost 4 weeks! It was nice to get away, but I guess it's time to start meal planning and cooking again. We got home on Jan 15th, and have been eating from the freezer/pantry mostly since we got home.

I'm working on my February meal plan this weekend, and will be posting on Monday. Time to get back to the food blog, and getting our meals organized and budgeted again.